Showing posts with label wood. Show all posts

Tuesday, January 31, 2012

not quite up to the (chisel) challenge.

"We need a chisel-challenge, don't you think? (peer pressure is how I manage to get myself to pull off about 85% of everything I do). We each need to make something with chisels for next week. deal?"
           - Allyson, Chisel Challenge champion

Allyson, you have won this chisel challenge, fair and square. Despite having twice as many children as I and a camera on the fritz, you rose to the challenge and managed to document it as well. I salute you.

In all seriousness, I can't wait to see the finished attacking lion stamp. I was planning on trying my hand at a woodblock printing. Now I'm thinking I might be able to handle a button. I pulled this sweater out to prove that, once upon a time, I did use my chisels and carving knife. A green cable sweater knit from Irish wool - a perfect remembrance of my trip to the Emerald Isle. The buttons, unfortunately, proved to be made of plastic and began to break after a few times of tossing my sweater onto a table. So I carved some wooden replacements.
Shame-faced, I offer my erstwhile (eight years ago, to be exact) woodcarving. Ah, but will you win the next chisel challenge??? (Quite likely, but it doesn't hurt to put up a brave front, eh?)

Thursday, January 26, 2012

knives, [no] camera, action!

So I've been chiseling today. I pulled a trapezoid from the scrap box in the garage last night and traced an "attacking lion leaping on this lamb over here" from the seven year-old's sketch stash and, well, at that point I hit the end of any previous expertise. I've never chiseled anything but soap before (which, for the record, is slightly easier to shave off than poplar), and had to consult "the experts" (google) for the next steps.

Apparently the main issue in chiseling a picture is whether to chisel-within or chisel-around. Technical, yes, but an important distinction, say the experts. Since I plan to stamp this lion on anything I can get my hands on in the next few days, chiseling-around seemed like the better option. Time will tell, but so far so good.

Unfortunately, things are not so good so far when it comes to my camera. On the fritz, so to speak. I feel slightly unnerved and thoroughly naked without a camera on my arm. How did I get so attached?

In the meantime, a Photo Booth shot will have to do. Me, some chisel, and a very slowly emerging lion.

Anyone else playing with wood this week?

Monday, January 16, 2012

new toys

My husband got a set of new chisels post-Christmas for making frames, and spent the rest of the break playing (er, working) with them.


He is in process of adding hand-carved corner samples to the sets he is making for some local galleries. There is something about wood chips at the kitchen table (and all over the floor, and in the baby's mouth) that is absolutely bewitching. Freshly carved wood -- every kitchen should smell that way.

The lingering wood aroma has got me dreaming about playing with the chisels myself. Wood cut prints, toys for the kids, maybe even a dog shaped bobbin holder? The possibilities seemed boundless.

I mean, think about it. What can't you make with eleven different shapes of sharp knives and a block of wood?

What would you make?

Monday, December 19, 2011

homemade tree

At first I planned to just forgo a Christmas tree this year. Our current apartment is far too small for one. We aren't even going to be here for Christmas. But I felt like such a scrooge.

And so the children and I went off to collect sticks. They were in their element. I bowed to their stick-choosing expertise. They revelled in it.

We drilled holes in them and slid them over a dowel. The kids decorated the tree, first with leaves. Then we carried our teetering tower inside and hung the ornaments and strung the lights.
Note to self: next time, use rebar. It lasted a grand total of one day. Our Christmas tree was short-lived, but well-loved.

Monday, December 12, 2011

wooden wreath puzzle: a tutorial

We've started decorating around these parts. A little late, I know, but festive enough to make up for the tardiness. This not-so-little boy, in particular, is fascinated by all the new things to look at and pull down and smash with a hammer. Ahhhh, the sweet explosions of holiday cheer.

Post-holidays, we keep all of our decorations in one box in the basement, and every year it's something of a mystery as to what will emerge from the depths unscathed. Something always manages not to. (Speaking of, how is it that a string of perfectly functional lights can be carefully packed into a box in January, and emerge eleven months later no longer functioning? Exactly what happens in that box all year?) But the mysterious state of the contents only adds to the anticipation; a whole year later, everything is brand new again.

But even with the novelty factor, the favorites are the somehow always the same. My animal-girl bolts for "the bird of wisdom" while the youngest girl twirls the star on its stick. The boys dig for lights and the 10 year-old sorts the breakables. Then everyone pulls back and comes to watch as the wooden wreath puzzle emerges, and the pieces are laid out on the table.

Hands down, this wreath is the family holiday favorite.


The wreath was designed and hand carved by my husband the first Christmas we were first dating. I'm telling you, for a girl who begged for a pocket knife and spent hours whittling soap bars in the garage, this was about as impressive a gift as he could have come up with. Every year when we pull it out, the intense smell of wood knocks my mind back twenty years. A good twenty years, and every Christmas between then and now.

The kids always jockey for turns putting the puzzle together and taking it back apart, while it stays down on the table. But once the wreath goes up on the wall, the enjoyment is more of a visual nature.

{See it back there on that bland cinderblock wall? Way off in the distance . . . }

So for today, an attempt at a holiday tutorial.

Wooden Wreath Puzzle
The wreath in its entirety is 16" diameter. You can either shell out for a 1x16 or, as my husband did, use a (much cheaper) 1x10 or 1x12 and cut the puzzle in two sections. Follow the instructions below for both options.

Material:
  • A 1x16 piece of wood, at least 16" long, or 2 pieces of 1x10 or 1x12, at least 16" long.
  • A hand saw OR scrollsaw/jigsaw OR bandsaw.
  • Sanding equipment. Either an electric sander, or plain old sandpaper is fine.
  • Beeswax polish, or other finish.
  • Ribbon for hanging - at least 1 yard long.
Safety: Wear safety goggles and proper ear protection if using a scrollsaw/jigsaw, bandsaw, or electric sander. Make sure they are in proper working order to ensure safe use.

  • Print out and trace the above pattern pieces. (If you have any trouble with the pdfs, please email me or comment below and I will send them to you directly.)
  • Lay the puzzle pieces out on a table, making sure the places where they meet fit well together.
  • If you are working with a 1x16 piece of wood (or have printed the pattern smaller and can fit the entire wreath onto a smaller width board), lay the entire puzzle, completely put together, on the wood. If you are working with a board that is too narrow for the entire puzzle, put it together in two halves (4 pieces each) and lay them on the board/s in two separate places.
  • Trace carefully around the pieces, one at a time.
  • Cut out each piece using either a hand saw, scroll saw, or band saw. (Note: if you are using a hand saw, be very careful to cut between the pieces as vertically as possible. Any slant in your cut will make it difficult to get rejoin the pieces from both the front and the back). If you have cut out the pieces in two sections, make sure that the end pieces of each section join to the other section well. Adjust the cuts on these outside pieces as necessary.
Finishing the puzzle pieces:
  • If using power sanders, gently and evenly rotate each puzzle piece along the sander. Be careful not to remove too much from the points of attachment, so the pieces still fit snugly together.
  • If using sandpaper, start with a coarse grit (60) and sand all surfaces until smooth. Use progressively finer grit (higher number) sandpaper until you are happy with the feel of the surface.
  • Wipe the sawdust carefully from all pieces.
Finish the pieces.

1. Protect with beeswax.
  • Apply beeswax with a soft cloth, working it into the wood.
  • Let dry.
  • Apply additional coats as desired.
  • To maintain your puzzle, periodically reapply beeswax.
2. Protect with paint, stain, or other sealant. [Note: If you prefer to finish the pieces with a clear polyurethane or paint, be cautious with the joints; any build-up between pieces can make them difficult to fit together.]
  • Apply with a fine bristle brush.
  • Let dry.
  • Apply additional coats to surface (not between pieces) as desired.
  • When finished, double-check that pieces are able to fit together smoothly, and sand lightly at attachment points if necessary.
Hanging puzzle.
  • If your pieces fit snugly together, it should be safe to hang your wreath on the wall. Make sure to first attempt hanging it against the wall very close to the ground, with a soft surface to catch any pieces that might slip out. If your wreath does not stay together when vertical, you can put a small piece of finish-safe tape at the joints to keep it from coming apart.
  • Put puzzle together on a solid, movable board or piece of cardboard, on a flat surface such as a table.
  • Slide ribbon under the puzzle and tie at the end.
  • Carefully move the horizontal board to the wall and attach the ribbon to the hook or nail on the wall. For the safety of your wreath, do not hang it on a door or other mobile surface.
  • With the wreath weight on the ribbon, hold the pieces to the board with your hand while you shift it from horizontal to vertical, hanging against the wall. If the wreath is secure, remove the board.
And enjoy.

Thursday, December 8, 2011

trying to be a giant


{photo via stylebyemilyhenderson.com}

Have you seen the I'm a Giant Challenge? I don't surf around much, but somehow I happened upon this and couldn't get enough of all the variations in progress. Maybe the addiction was my past resurfacing: I built my very own dollhouse, you see, way back in the preteen days, electrical wiring and handmade quilts and all. Apparently I was a budding design guru back then, when all along I just thought I was a little extra dorky.

When I stumbled upon it, this official Challenge seemed like a gift from the heavens, dropped right at the opportune moment. A little something to redirect the design impulses of my 10 year-old. Maybe if she had a mini-kitchen to revamp, I thought, my actual kitchen could go back to . . . usable.

So I pulled out some wood glue and went about repairing the kids' dollhouse. I glued the front panels and stairs back together, took the stickers off the outside, and even put the lintels back on the front windows. And then I told that girl of mine to have at it.

"You can paint it or wallpaper it!" I said. "We can make rugs and curtains and quilts if you'd like! Heck, we can even decorate the thing for Christmas! It's all yours to rearrange and redecorate over and over and OVER!"

"Hmmmm," she replied, considering carefully. "That sounds fine . . . as long as I can still rearrange and redecorate my room. And stuff."

Dang.

How in the world did she know where this whole idea was headed? I knew I should have left off the exclamation points.

The 7 year-old seemed to know as well. That night she stormed into her room, furious about one thing or another, and took a sharpie to the exterior. The entire front now looks a lot like an Andy Warhol variation of the word "NO!"

Of course, a little NO is nothing a can of paint can't take care of. Or maybe a layer of fake bricks? Siding? Even if I'm the only one redecorating the dollhouse, it looks like it's going to be getting a little facelift in the coming days.

At least there will still be one home over which I've got some creative control . . .

Tuesday, August 2, 2011

dollhouse puzzle (a tutorial)

It has been so satisfying to make wooden toys that inspire imaginative play in my children. Some of you requested a tutorial for making this beautiful toy (not my own design - the company that came up with the brilliant design sells the finished product through companies such as The Wooden Wagon).
Except for the table and chairs, the pieces of this puzzle are open-ended. My girls play with them in a variety of ways, as well as in conjunction with other wooden toys. I especially love watching the girls play with this puzzle when they intersperse objects found on nature walks.
As with the rainbow arches tutorial, this tutorial doesn't have photos of the machines you'll be using as I'm nowhere near my dad's woodshop at present.

Materials for a dollhouse puzzle:
  •  A 9" x 6" piece of hardwood, about 2 1/2" thick. Oak, Elm or Sycamore are some suitable options.
  • A Bandsaw. My dad strongly recommends bandsaws as opposed to jigsaws. He says that a  jigsaw typically wouldn't be powerful enough to make smooth cuts through such a thick piece of wood - the blade would bend and result in a slanted cut.
  • Sanding equipment. I used an Oscillating Spindle Sander and a Belt Sander, but plain old sandpaper will accomplish the same thing, just a lot more slowly.
  • Beeswax Polish. I purchased mine here.
Prep: Make sure your wood is squared before beginning.
Safety: Wear safety goggles and proper ear protection when using the bandsaw and sanders. Make sure they are in proper working order to ensure safe use.
click here for pdf pattern
  •  Trace the pattern above onto your wood (the shaded portions are empty space in the finished puzzle).
  • Cut away the outside portion first, then work your way into the interior shapes.
  • Go slowly and steadily for smooth cuts.
  • The chairs can either be left as is for a bench-like look, or sliced in half (depth-wise) to create 4 individual chairs.
Step 3: Sand the puzzle pieces
  • If using power sanders, gently and evenly rotate the puzzle pieces along the sander.
    • Use a table belt sander to sand the outer edges of the pieces.
    • Use an oscillating spindle sander to sand the inner sides of the pieces.
  • If using sandpaper
    • Start with the coarsest grit (60) and sand all surfaces of the puzzle pieces until smooth.
    • Use progressively finer grit (higher number) sandpaper on all the pieces up to at least 220 grit.
  • Wipe the sawdust off the pieces.
Step 5:  Protect with beeswax.
  • Apply beeswax with a soft cloth, working it into the wood.
  • Let dry.
  • Apply additional coats as desired
  • To maintain your wooden dollhouse puzzle, periodically reapply beeswax.

Friday, May 20, 2011

on slates and old-fashioned entertainment

I must admit I've been a bit obsessed with these skirts. I started out making one for my older daughter. I was so delighted with how it turned out that I had to make one for her sister as well. Then, after Allyson's enthusiasm and suggestion to add a pocket for a little notebook and pencil, my imagination started running wild. I dreamed of the girls carting around charming little slates and slate pencils and doodling on them instead of Magna Doodles; pulling them out of their pockets to keep themselves busy at church, instead of filling in a coloring book's idea of what kids want to draw (unicorns dancing on clouds, for example).

My daughter and I have been making our way through the Little House on the Prairie book series. These books are delightful and inspiring in their simplicity. When I read to her about Laura and Mary, what little they had yet how rich their play was, she is enthralled. So am I. Allyson's post on simple games made me wish that battery-powered toys, computer games, and videos had never been invented. I thrill at wooden toys and toys that encourage open-ended play. I sometimes wonder if this obsession of mine has created an exaggerated yearning in my daughter for plastic toys. A four-year-old's version of rebellion?

And another thing: it's not only the quality of the toys my kids play with that concerns me, but also the quantity. Laura and Mary were brimming with happiness when they received a stick of candy, a heart shaped cake, and a penny in their stockings for Christmas. Laura cherished Charlotte, her rag doll. Her only doll. Perhaps even her only toy.

I've put a lot of energy into keeping in check the number of toys we acquire. Sometimes I wonder if I'm being unnecessarily controlling. Does not letting my kids have a room packed with toys make me a mean mom? And when my children declare their boredom, I have second thoughts about my principles. My daughter routinely begs for trips to the dollar store - she simply wants more stuff. Is this where Americans' obsession with having, getting, and buying begins? As children with little impulse control bombarded by store shelves lined with inexpensive plastic toys?

Is obsession too strong of a word? The number of companies devoted to helping us manage and successfully organize the excess we have makes me think not.

If I can somehow teach my children to enjoy and be content with a few well-chosen toys, will that spill over into their habits as adult consumers?

Back to my slate fantasy. Slates and slate pencils, it appears, are no longer made. I looked long and hard for them and only found a few antique slate pencils on Etsy and eBay, but nothing that would work for my purposes.

So I decided to make my own little chalkboards.
 And some little pockets to hold them.
The girls doodled on them happily.
Even wore them happily.
And then frolicked in the long shadows of the evening.

Thursday, May 19, 2011

wooden rainbow arches (a tutorial)

There were some requests for a post on making the rainbow arches, but as I am thousands of miles from my dad's woodshop, this will be a tutorial without the aid of photos. This is a straightforward project but does require special tools and a fair amount of patience. But the end result is a gorgeous, versatile heirloom toy.
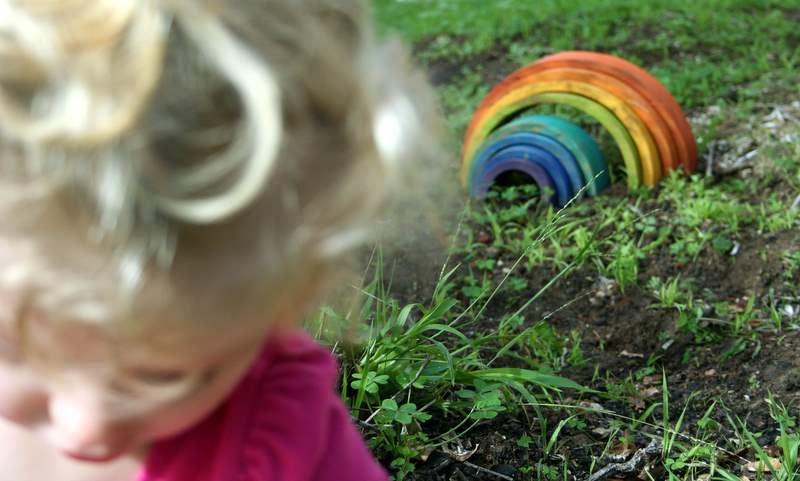
These can be stacked in endless combinations.
They can be a spectacular play structure for tiny toys.

They can be used as tunnels, boats, to create mazes... so many possibilities!

Materials for a 12 arch rainbow:
  •  A 14" x 7 1/2" piece of hardwood, about 2 1/2" thick. Oak, Elm or Sycamore are some suitable options.
  • A drawing compass.
  • A Bandsaw. I asked my dad if a jigsaw could be used if one didn't have access to a bandsaw. He said that jigsaws typically wouldn't be powerful enough to make smooth cuts through such a thick piece of wood - the blade would bend and result in a slanted cut.
  • Sanding equipment. I used an Oscillating Spindle Sander and a Belt Sander, but plain old sandpaper will accomplish the same thing, just a lot more slowly.
  • Craft paintbrush.
  • Non-toxic liquid paints such as liquid watercolors.
  • Beeswax Polish. I purchased mine here.
Prep: Make sure your wood is squared before beginning.
Safety: Wear safety goggles and proper ear protection when using the bandsaw and sanders. Make sure they are in proper working order to ensure safe use.

Step 1. Use the drawing compass to draw a template of the arches on your wood.

Mark where the midpoint of the bottom of your board is.
  
 Place the point of the compass on the midpoint and draw a semi-circle with a 1" radius.
 Keeping the compass on the midpoint, increase the distance 1/2" at a time and draw a series of arcs, 12 total.
half template
 Step 2: Cut along the arches using the bandsaw.
  • Cut away the outside portion first.
  • Go slowly and steadily for smooth cuts.
  • Instead of simply pushing the wood through the blade, think of yourself as rotating the wood around the blade. This will help your cuts be smooth and your arches be uniform.
  • Start with the largest arch and work your way down to the smallest arch.
Step 3: Sand the arches
  • If using power sanders, gently and evenly rotate the arches along the sander.
    • Use a table belt sander to sand the outside of each arch.
    • Use an oscillating spindle sander to sand the inside of each arch.
  • If using sandpaper
    • Start with the coarsest grit (60) and sand all surfaces of the arches.
    • Use progressively finer grit (higher number) sandpaper on all the arches up to at least 220 grit.
  • Wipe the sawdust off the arches
Step 4: Paint/Dye the arches
  • If I had more time and more know how, I would have attempted to dye the arches using natural substances (e.g. berries, roots, etc.). I found some interesting tidbits about dyeing wood online, but decided to go the easy route and use paint in the interest of actually finishing this project!
  • I wanted the wood grain to show through the paint, so I thinned it a bit with water before applying it to the wood. I applied paint and let it dry, then applied more layers as needed to get the look I wanted. Because I allowed the grain to show through the colors were somewhat muted, but I liked the end result. Using more opaque paint would ensure brighter colors.
Step 5:  Protect with beeswax.
  • Apply beeswax with a soft cloth, working it into the wood.
  • Let dry.
  • Apply additional coats as desired
  • To maintain your arches, periodically reapply beeswax.

    Friday, May 13, 2011

    wooden

    What is it about wood? The meandering grain, sometimes predictable, sometimes surprising. The soft feel of it after hours of sanding. It is substantial and sturdy. I make my children's toys out of it. I wish my entire kitchen could be outfitted with wooden dishes. I'm hoping to try my hand at turning bowls on a lathe next month when we visit my parents and their garage full of woodworking tools (thanks, Dad!).

    I was thrilled when I came across these vintage beauties at a garage sale last week:
     

    Perfect for the girls' play kitchen (which is still undergoing renovations).

    Tuesday, April 26, 2011

    picture frame picture

     
    Today is our anniversary.

    8 years! A short time compared to some of our friends, but compared to us, it's the longest we've ever been married.

    When we were dating, I made my future husband a picture frame painted with fond memories from the relatively short time we'd known each other.
    It's funny to look at now and think about the ways I felt close to him when our relationship was just budding. This frame would be quite different were I to make it today. It would probably depict him making dinner and putting the girls to bed solo while I rest with our baby at the end of a long day. Or show him pulling an unimaginable string of all-nighters as he works to finish his dissertation. Or where he massages my exhausted body though he slept even less than I did the night before. Or where he teaches our four-year-old how to dance like a robot.  Or perhaps a middle of the night scene where he calmly shushes and comforts our sleepless baby after I've despaired that the crying would be infinite.
    And I expect that in another 8 years, the frame would yet again be completely different. I know you mock cheesy romance, my dear, but I imagine that the new picture frame pictures will be just as rich and meaningful to me when we get to 16.