Thursday, March 31, 2011

growing wheat

The mowers were out today, blowing leaves and trimming hedges and raking debris. And mowing. I thought I must have missed a month -- what can there possibly be to mow in March? The grass outside is still all sorts of brown, but freshly mowed it smells, well, green. Sweet and fresh and green. I love the daffodils and tulips just sneaking up through the dirt, and the new leaves are even starting on the trees. But it's the grass starting to green that finally feels like the ground is breathing again. Finally feels like Spring.

So to mark the shift, and to get some of that sweet green inside, we thrifted some easter baskets this week, lined them with old bags and dirt, and sprinkled wheat. I've read about people growing grass seed in their easter baskets, but I don't happen to have any on hand. I do, however, have about a dozen buckets of wheat ready for the sprouting (and grinding, and throwing, and chewing -- did you know that a mouthful of wheat chews into gum? or so the kids tell me . . . ).

The five year-old is in charge of watering. She's been using the spray bottle from the laundry room, and apparently misting is the magic touch. Either that or wheat is awfully quick to sprout. In three days we've gone from this:


To this:

At this rate, we're going to have to mow it before Easter ever arrives.

Wednesday, March 30, 2011

wednesday's ode

To beautiful surroundings.

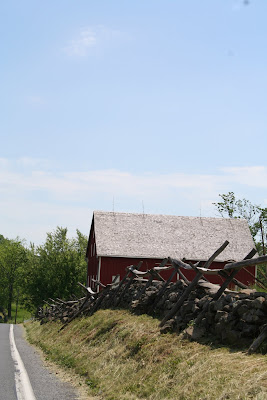
And to all the souls that still haunt Gettysburg.


Tuesday, March 29, 2011

Reading, 'Riting and 'Rithmetic Skirt


I saw these fabrics paired together in my local fabric store, an alphabet embroidered on the notebook paper fabric. So charming! After seeing it, I couldn't possibly NOT make something for my daughter using the same fabric and embroidery idea.
Though the skirt was a simple design, I really went all out on the details with this project. It was my first time doing embroidery on clothing (I've always been a bit prejudiced against it, associating it too closely with pompous monograms) and my first attempt at pintucks. I will most assuredly be doing more of both soon. What a delightful project.


Monday, March 28, 2011

going sour

The best bread I have ever tasted was an intense, earthy, heavy, whole wheat sourdough. We had some of it the first night we arrived in France, now more than twelve years ago. In one of those convoluted multi-faceted twists of fate, we had arrived in Angers for a school-year stay and were picked up at the train station by the the father-in-law of the son of an acquaintance of my husband's grandparents. (See? convoluted). The man took us to his home to stay while we looked for a place of our own, and at the first meal we were greeted with a bread that was so heavy every knife seemed dull trying to saw through it. So heavy my teeth hurt to bite into it. So heavy I felt full for hours. So heavy, really, that I felt like I'd died and gone to culinary heaven.

In the years since, I've gotten the recipe from his son (now my brother-in-law -- see? the convoluted and lovely turns fate takes) a number of times, but never managed the courage to try it. I mean, just say it out loud: Sourdough Starter -- doesn't that sound scary? and hard?

But after my unexpected baguette success, I decided to finally give sourdough a try. And here's the thing -- it turns out that sourdough starter is actually no big deal. At all. A little water, a little flour, five minutes a day for a week or so, and there you have it.

I made both the starter and the bread from recipes in Local Breads, opting for a very mild tang to begin with. (Did you know "sourdough" can actually be sweet? Only certain types of starter actually have that tangy sour that store bought sourdough tends to have). The first batch didn't have a lot of lift to it, what with a young starter and all. But I was so excited to see it actually staying roundish in the oven that I took a picture of the loaf through my very (very very very) dirty oven door as it cooked.

And the ultimate test -- how does it taste?

According to six-out-of-the-seven members of our family currently ingesting solid foods, Spectacular. The six year-old would rather have something with "less wheat, a softer crust, and some sweet in it." I guess you really can't please all of the people all of the time.

Friday, March 25, 2011

thank yous of the homemade variety

After promising my older daughter some painting time together yesterday, it seemed as though the universe was conspiring against us. The baby suddenly wanted to be fed, simply wouldn't burp afterwards, and then proceeded to spit up massive amounts of milk every time I neglected to hold him perfectly upright. Then I noticed that my two-year-old had dumped out the entire box of Pictionary cards for the umpteenth time and, with a shuffling sort of dance, was spreading them across the entire living room floor. Now the baby was tired and needed a diaper change and then to be put down for a nap. During this whole process, my four-year-old sat at the table with her watercolors and paper, calling after me "I thought we were going to paint!"

I was finally able to sit down with her and together we painted some thank you cards for all the wonderful people that brought us meals over the past two weeks. We complemented each other on our paintings and discussed when she would be old enough to have watercolors and brushes like mine. The two-year-old sat across from us intently dripping water into her paints, yet never brushing her paper with anything but water. This moment of calm with my girls reminded me what a lot I have to be thankful for.

Thursday, March 24, 2011

a trip to the museum


Before I ever had kids, I loved loved loved going to art museums. So much inspiration and color and depth. So much to get me thinking, to make my hands itch to draw. When the older kids were very young I tried to haul them along to the art museum, and earned a lot of frustration for the effort. Young kids, as it turns out, aren't all that interested in paintings that don't move. They are also rarely quiet. Art museums soon became a thing of my past.

At the time we lived near a relatively decent Children's Museum. It was geared to younger kids, but younger kids were what I had. So for a few years I was set. But at some point the older kids aged out of that museum, and I was once again scouting for a place I could enjoyably drag all age groups.

Enter Chicago. When we moved within a few hours of the city, I decided to give the museums a try. Name your brand, Chicago's got at least one: aquarium, natural history museum, art museum, zoo. Big and broadly-aimed, each of them had something (and generally a whole lot of something) for everyone to love. Moving from the midwest was sad for us on many levels, and leaving the museums was definitely one of them.

So imagine my joy that we ended up here, within striking distance of Denver and all its superb attractions.

First visit: The Museum of Nature and Science.


And I have to say, we're hooked.

Have you taken young kids to museums? And more specifically, to art museums? I'm thinking of giving them another try and would love suggestions to make it more successful. Maybe divide up the kids? Or start with smaller museums and phase them in slowly?

Wednesday, March 23, 2011

wednesday's ode

To beautiful surroundings.


Tuesday, March 22, 2011

resized pants: spring weather edition

Awhile back I made a pillowcase for my older daughter. She needed a pillowcase and the day and night design was a good way to use up some fabric scraps and make it a bit interesting. The surprising thing was that she really got into the idea. Every day when she woke up, she would flip the pillow over to the sun side. Then right before bed she would turn it over so that the moon faced up. Considering her disdain for some of my projects that I thought she'd adore, I was quite pleased by her enthusiastic response.

Yesterday it alternately clouded over, rained, cleared up, then was bright and sunny. Our hopes for playing outside were dashed every time it began raining again. Can you imagine the roller coaster of emotions that the weather can evoke in a kid that just wants to go out and ride her bike? (As well as the mom who knows all too well how the afternoon will go with no outside play.) I thought it might go over well to give J a way to respond to the weather's teasings by adding a little something to her new pants.
 I'll let you know if it works...

Monday, March 21, 2011

pinata [of the indestructible variety]

I'm not sure when it happened, but at some point in the past decade and a half, a pinata became absolutely mandatory in our family birthday celebrations. And I, having made more than my share of pinatas in the 6th grade (we sold them to raise money for a field trip -- now that's my kind of child labor), became the official pinata maker.

I initially went the balloon and paper mache route. For those unfamiliar (what? this isn't the main skill you picked up in 6th grade?), the paper mache route takes about three days and includes, a large round balloon, paper mache, and shredded newspaper. Just mix these three ingredients together (not really -- you blow, tie, dip, plaster), let dry overnight, add more of the last two ingredients, let dry another night, and then cover with fringed crepe paper (and anything else you might want to add). Streamers, pictures, stickers, cones. After hours and hours, the pinata might look something like the top row of these superb examples:


But after a few (one), my pinatas became much simpler. More of the plain egg-shaped variety, to be exact. We did an Ice Cream Cone and then an Eyeball, and at least one Princess Face (for the boys to smash, of course), before the pinatas became simply Colored Circles.

And then, inevitably, we ran into another problem -- longevity. Homemade pinatas of this type just didn't last all the way through an entire line of kids, especially when it comes to growing boys with a wooden baseball bat. Three strikes, and the candy was out.

Add to that a much smaller amount of time I was willing to devote to Pinata Creation, and a new variety of pinata was born: The Box.

I'm telling you, The Box is the best pinata idea since . . . round pinatas.

Take a shoebox, fill it up with candy or pencils or bouncy balls -- whatever your prize of choice, duct tape it shut, let the birthday kid decorate it, and you've got one superb pinata. Even with a handful of tweens in line, these boxes take round after round to destroy.

Sometimes we even have to call in the Big Guns to open it up.

Friday, March 18, 2011

just another cathedral

Once you've seen one cathedral, you've seen 'em all. Right?

When I was 15, my parents brought our entire family (7 people total) to Europe for 3 weeks. It required a huge amount of planning and, even though we took the "Europe on a Shoestring" approach, it was not cheap. My oldest sister was 17 and my youngest was 6. My parents' dedication to carting around 5 kids with such a wide range of ages in an attempt to introduce us to European culture, architecture (and patisseries, at my father's insistence) astounds me. My great respect for what they took on (as well as suspicion that they may not have been completely sane in doing so) has grown with each subsequent child we've had.

Although I remember my siblings having their own hangups that added to the stress of our European experience, it is a well accepted fact by all my family, me included, that I was the biggest problem we faced while there. (Except, perhaps, for the tent poles we forgot to pack and the replacements we never managed to locate for the rest of the trip.) At 15, the thing I most wanted was to blend in with everyone else. As a family of 7 with two parents who spoke a smattering of French, German and Spanish between them, we were obviously tourists. Instead of enjoying the experience anyway, I spent a fair amount of time sullenly hiding out in our van as the rest of my family toured museum after museum, castle after castle, and cathedral after cathedral. After all, I reasoned, once you've seen one cathedral, you've seen them all.

How is it that something that looks so unremarkable to a 15-year-old can cause an adult to snap photo after photo in an attempt to capture the artistry and lines of the architecture, no matter how many cathedrals they've already seen? This cathedral I visited a few years ago in Bordeaux, France was one such place. I couldn't get over the light shafts cutting across the arches, accentuating them. So I decided to paint it as well.

As an adult, I have been to Europe twice. I visited every museum, castle and cathedral available to me. And, of course, I stopped in at quite a few patisseries. Well done, Mom and Dad. I finally get it.

Thursday, March 17, 2011

simple games

As I remember it, when we were kids we played games. Actual games, I mean, mainly in the actual outdoors. Kick the Can, freeze tag, jump rope, hopscotch. Just say the word "summer" and my mind goes straight to Night Games in the cul-de-sac with the entire neighborhood and every flashlight we could get our hands on. Or I think about making fishing poles in the gully (although I don't ever remember seeing a fish in that creek), or building things with my dad's tools and scraps from the wood pile. One winter we decided to put on an ice skating show in the backyard, and spent a week trying to ice over the porch, dutifully spraying it with the hose every night. Unfortunately the thin skiff of ice melted every day by noon, but we kept trying and trying, and kept throughly occupied in the meantime.

Now while I am more than willing to admit that "the good old days" were rarely as rosy as I often remember them, it really does seem like many of these games have been lost on my kids' generation. And that just seems sad. When the words "hoppy taw" draw blank stares, something has gone wrong in the world.

So imagine my joy this year at finding that a few of these games are making a schoolground comeback. Four square is the new It at our kids' school, and I couldn't be more thrilled. At present four of the kids attend a K-12 charter school, which means my eighth grader is frequently in a serious four square match with a couple of high school kids and a sixth grader (or some other crazy age mix). Or the fourth grader is taking down a high school senior. I mean really, how cool is that?

This afternoon the nine year old came in looking to recruit a few players. She had scratched a four square court in the parking lot with a rock.

After some coaxing, she got a big enough group. Now we certainly have our share of disagreements and arguments and straight-up brawls around here, but once in a while this sibling thing is downright cool. And siblings playing Old School? Be still my heart.


Time to start looking for some hoppy taws and a bag of chalk.

What are some Old School games you would like to see come back?

Wednesday, March 16, 2011

wednesday's ode

To beautiful surroundings.


Tuesday, March 15, 2011

resized pants (a tutorial)

Ever since my successful resizing operation on my husband's mangled pants, I've been eager to do it again. I find it almost impossible to keep the four-year-old in pants that fit her AND that she finds comfortable enough to actually wear. The biker pants have been snatched up and worn immediately every time I do laundry - obviously a big hit with her.

I found a pair of unwearable cropped pants at the Bargain Barn the other day and decided the thick material would be perfect for my active girl.
Start by cutting the back and front completely apart along the side seams and inseam.
Pants Front:
Fold the pants front in half and, using one of your child's pairs of pants as a pattern, lay it out making sure to match up the top and crotch seam (1 and 2). Cut around the pants, leaving the crotch seam untouched and adding about 1/2" to allow for seam allowance (3 and 4). Also cut the pants longer in order to accommodate a hem.
Cut off excess material (i.e. front pocket linings - 5) and remove button loops unless you are satisfied with where they are positioned (6).
Pants Back:
I chose to remove the back pockets on these pants (1) since they seemed too big once I cut down the back. Fold the pants back in half and position the pants you are using as a pattern over them. If you are keeping existing pockets, you'll want to center the pants over them (2). You will need to have the tops of the pants even before you cut, but you will probably need to cut the back seam. We will be adding elastic to the back of the pants to insure a better fit, so if the pants you are using as a pattern don't have elastic in them, add a few inches to what will be the side seam. Again, cut around the pants leaving about 1/2" extra for a seam allowance (3 and 4).
  
Sew seams together:
Reassemble the pants, starting with the back seam. Pin the two back pieces, right sides together (1), making sure to carefully match any topstitching (3). Stitch together (2).
Next, sew the side seams together. Again, with right sides together, pin the side backs to the side fronts and stitch.
Finally, sew the inseam, again pinning the inseam of the front to the inseam of the back and stitching together.
Waistband:
Cut a strip of material (using either scraps from what you've cut off of the pants, or a contrasting fabric) that is the length of the waistband at the back of the pants and the width of the waistband plus about 1" (1). Turn under the long sides of the strip a 1/2" on each side and iron. Pin to the inside of the waistband (3). Stitch to the waistband by following existing topstitching (4). Only stitch the long sides, leaving the short ends open. Insert elastic into the casing you have created and try them on your child to find the amount that will make them best fit. Sew down the ends of the elastic along with the short ends of the casing.
Hem:
Turn under about 1/2" of the bottom of the pants and press (1). Turn down another 1" to 2", depending on how generous of a hem you want, and press (2). Topstitch the hem (3).
  
Finishing Details:
The existing fly opening will probably look too long for your newly resized pants. Making sure the fly is completely zipped up, shorten it by topstitching a little farther up, following the curve of the original topstitching (2). Pick out the topstitching below the new curve you've created (3). The marks from the old topstitching will be unnoticeable after a few washings.
If you wish, sew belt loops back onto the waistband (4).
If you removed the existing pockets and wish to add new ones, you can do so at this point.
And there you have it - you have single-handedly saved a pair of pants from the landfill!